About my garden

Saturday 31 May 2014

What's good in the garden?

It's such a  wonderful time of year, there is so much going on. Here are some highlights. 
The bud of a Cephalaria gigantea, slightly macabre I think, but very beautiful. It turns into this:

 
Osteospermums everywhere. So lovely. 

Perennial wallflower which sprawls and will not behave but is forgiven for these flowers.

Some of the most lovely flowers. Broad beans. Tiny beans are growing - one of my favourite crops.
No words necessary. 

I watched this bee climb up the bench walk all the way along to one end and then back again. It came across these forget -me -nots along the way and stopped for a drink. Then it fell off then end of the bench and I lost it. I have no idea what it was doing. 


Tuesday 27 May 2014

Show of hands

These are my photographs for A Show of Hands. A Chelsea fringe 2014 idea. This is from the wonderful Veg Plotter whom I first discovered via the 52 week salad challenge. I aim to try harder with that this year. The idea behind this year's project is to highlight the tool most precious to a gardener: their hands. Submit a photo or collection of photos of hands.

These are the things my plants need ....apart from me of course. I like to think they need me.
Light and air - yes even from that grey sky.


Soil - this is a handful of my homemade compost teeming with micro-organisms.

Water - saved in a butt of course!


I managed to take the photo without dropping the phone in the water butt - should have got help really. These are taken in my garden in Somerset. Grey today but looking fab as I hope you'll see in some of my other posts.

Monday 26 May 2014

Germinating peas, beans and old seed...

I have in the past found that when I sow sweet peas straight into pots I often lose about one third of the seed as they just rot. I think I overwater.
So I have developed a system, by no means original, of germinating on kitchen paper. 
I soak the seeds overnight if they are beans or peas and then put then on a folded piece of wet kitchen paper. 
Roots start to show first.I fold the top half over the seeds to keep them damp and try and remember to look at them every day. This is a few days growth. You can quickly see if any are rotting and throw them away.
Pot them up when they are growing well. Reminds you of school doesn't it? It is so exciting to actually see the growth.  
A week or two later. 
Then outside after hardening off. 
These were germinated in this way and are now heading up the canes quite happily. I have probably put them out a week or two earlier than usual but the weather is warmer this year so fingers crossed. xx
This year I have also been germinating old seed and lettuce in the kitchen. With old seed you never really know if it is still viable. I don't soak small seed, just put it on wet paper. If it hasn't germinated in a few days I assume it isn't going to and throw out. Sometimes a proportion of the seeds will germinate. This saves compost and the effort of sowing and re-sowing. 
A few days later I can be seen with a pair of tweezers and my glasses putting the tiny seedlings into trays of compost. I have managed to germinate some Zinnias this way which did not come up in the compst. I thought I'd give them one final chance before ditching the packet and I'm glad I did.


Thursday 22 May 2014

Planting out tomatoes.


These are my tomato plants growing on a windowsill. Every year I try not to let them get too leggy but take my eye off the ball and there they go. (They are always alright in the end and fruit very well).
I've started to plant them out in the greenhouse.
I have soil in the borders of my greenhouse and I know this can carry tomato blight and affect the plants. It's recommended that you dig out the soil and fill with new clean soil. I did do this once but it was such hard work that I have never done it since. 
I find they grow better in the soil than in pots or grow bags so I have two ways of growing now:
- Direct in the soil -  I usually dig out a hole and fill it with compost or soil from a growbag or often a mixture, then I put the plant right at the bottom of the hole so the soil comes up at least to the two seed leaves and backfill with soil/compost.
Tomatoes can root right along their stems so if you bury the stems they will produce more roots. Sometimes you can see the white  roots forming on the stem. 


- Last year I tried a different method. I think I saw this used for cucumbers first. I use large pots with the bottoms cut out. These are placed on the soil and filled up with compost so the plants can root into them but also grow out through the bottom. 

These are the ones in pots(with no bottoms) waiting for their canes. We have a framework for support and each tomato plant gets a cane tied into the top. I sometimes underestimate how heavy these plants are and they fall over. They can grow to about 8 ft if you don't stop them and as long as they keep fruiting, I let them. By the end of the summer I can hardly get into the greenhouse.
Both these methods get over the fact of the soil being contaminated. I do get blight but not until September or October and the plants have sometimes fruited in to November.  
I always get a great crop, and miss the great taste for the rest of the year, so lets hope this year is the same. 
I saw this tomato feed so I thought I would try it.It is granules. I often forget to feed them so I have added a handful of this to each pot and that should give them a good start. I make comfrey feed but more of that later...


Friday 16 May 2014

What to put in compost...


There aren't many pictures here so this is and extra. This is the seed head of an annual poppy - Papaver somniferum.  I don't tend tend to add these to the compost but they come up everywhere anyway. They are so beautiful though, I don't mind.

Things you can add to your compost heap:

Kitchen waste - vegetable and fruit waste, tea bags, coffee grounds, egg shells, dead flowers
Plant material - see below for execptions Wood ash
Paper
Cardboard
Grass clippings
Soft prunings from the garden - chopped up if possible and not thick and woody or they will take years to compost. 
Plant waste - things which don't come into the catagory below. 
Sawdust
Hair
Wood shavings


What not to add to your compost heap:

Seeding weeds-


don't add these unless you want a garden full of them! It is very beautiful though. 

Likewise the roots of pernicious (good word) weeds. The composting probably won't kill off the roots or seeds and you will be adding problems to your borders for later. So no bindweed, dandelion, brambles, celandine.
Cooked food. It does rot down but may attract rats. 
Large twigs or woody growth. Too slow.
I don't use any chemicals so I wouldn't want to add grass clippings or any plant material which had been near weed or moss killer.
Diseased plants. Up to a point you need to know your disease as some will be not survive on dead plant material or through the winter (ie powdery mildew). Soil borne diseases will persist though. ( Onion white rot, clubroot etc).  If in doubt, though, leave it out. 

Tuesday 13 May 2014

Wonderful spring weather

The mild sunny weather with frequent rain storms has been perfect for my garden. Everything is growing and looking lush and green. The low growth of April which features primroses, celandine and crocus has been superseded by the taller growth of May.
Aquilegias are coming out. They seed themselves around and interbreed quite happily. I let them and just dig up a few now and then and weed out some of the small seedlings so there is room for a few other things.
This calendula has been flowering for about a month now.

Usually the plants die off in the winter and the seedlings only start to show about now. Then I don't get the flowers until summer. This is a real bonus to have them now as, I think, they are my favourite flowers. It's always a difficult question as the answer can change from month to month but I like the simplicity and bright colour of these. They always look great in my vegetable garden. It's just on the edge of a veg bed but I'll leave it and deadhead so hopefully it will go on.

 This is a kiwi plant. Or rather two growing towards each other. We grew them from seed quite a few years ago. When my children were much younger and eating kiwis, we were talking about the seeds. So we sowed some and lots came up.
 They grow like triffids every year and we never manage to train it properly. I don't know if you can. This year we have put up a frame and pruned it early and tied it in so maybe we'll keep on top of it.
Every year we look for fruit.  You need a male and a female plant to get fruit and, if course, having grown them from seed we didn't know what we had. There have been a few flowers but they are very tiny so we don't always see them. The last year we had ONE kiwi fruit. You can imagine how excited I was. 
 The new growth is red and hairy and looks a bit like a triffid too. These are the flowers...

There do seem to be quite a few. Maybe because we have looked after it!

No room to move.

It's that time again, it happens every year, I can't move for young plants waiting to move outside or into the greenhouse. 
Every available space is taken up and even though I try and move things on to the next stage as soon as possible you can't hurry it or plants die. Hardening off for instance needs to be done properly or you lose the plants at the next stage. I use my cold frame - putting things in open during the day and closing it at night, for a week or two and then move them outside. 
These are some sweet pea plants which have been in the cold frame and then outside in their pots for a few days. I finally got them in the ground. 
 These are mostly courgettes. I put them into slightly bigger pots and into the cold frame this weekend. It was so windy I was worried for their safety as the leaves are quite vulnerable. I'll give them a good two weeks to harden off.
 Things turfed out of the cold frame to make  room for more....
This is my fabulous cold frame made out of old windows.  The tops come down or can be propped half open, which I do on very wet days.
Beans hardening off outside. I pop a cloche over them at night as I have no more room in the cold frame. These are some runner beans 'Scarlet Emporer' and some climbing french 'Hunter'.

A couple of years ago we made a temporary cold frame from old bits of plastic and windows held up with canes. I appreciate that not everyone has old bits of window lying around but if you have it works very well and then can be dismantled when you don't need it.

Monday 12 May 2014

Amazing little creature..


It looked just like a piece of twig attached to the catch of my shed door. Then I came back a bit later and it was on it's way down the frame. Inch by inch!

Wednesday 7 May 2014

Turning the heap

Turning your compost is very good for it as it speeds up the process. ( And a very good workout for you). It adds air to the mix and encourages the heap to heat up. It also mixes the waste. You will see when you turn that some parts are decomposing more quickly. This can be because it is too dry.
This is one of my wooden heaps:


 The front is made of slats so it is very easy to dig out the compost.
I recently started to dig out the wooden bin next to this one. There was some good compost but also a lot of dry material which was not rotting very well. Probably the remains of last years autumn cut down. I dug out what I could and am in the process of sieving it (see my last post).
Then I started to dig out this bin and fork it over to the next one.
I layered it up with some grass clippings and green material. I did it over a week or so, added material as I had it and forked over some more from the left hand bin.  Grass clippings are very good for speeding it up but should be added in thin layers.
This is the first heap to the right hand side.


It is now full so I covered it with some old carpets. It is quite wet as we had had rain during the time I was digging and re-filling but if it seems dry you can add water. 
Now I'll leave this to cook for a month or two and then have a look to see how it is doing. It may not take as long as usual as some of it was half rotted anyway.
In the meantime, I still have some sieving to do but I can use that lovely compost for my courgette plants!


Saturday 3 May 2014

My compost system

I have four compost bins two wooden and two black daleks and I tend to use them in twos. I fill up one with waste and then let it cook for a while until it's partner is full. This takes different lengths of time depending on the time of year. There is much less waste in winter and I am not out there nearly as much so composting slows right down for a few months.
When one bin is ready I dig out the compost. I have to admit that it usually has bits of stick, stone and even plastic in it so this is when I sieve it.
I saw someone do this once and though he was mad but when you actually do it it is so satisfying and doesn't take that long. You don't do the whole heap at once. Or I don't. The you are left with fabulous friable compost that you want to show off.
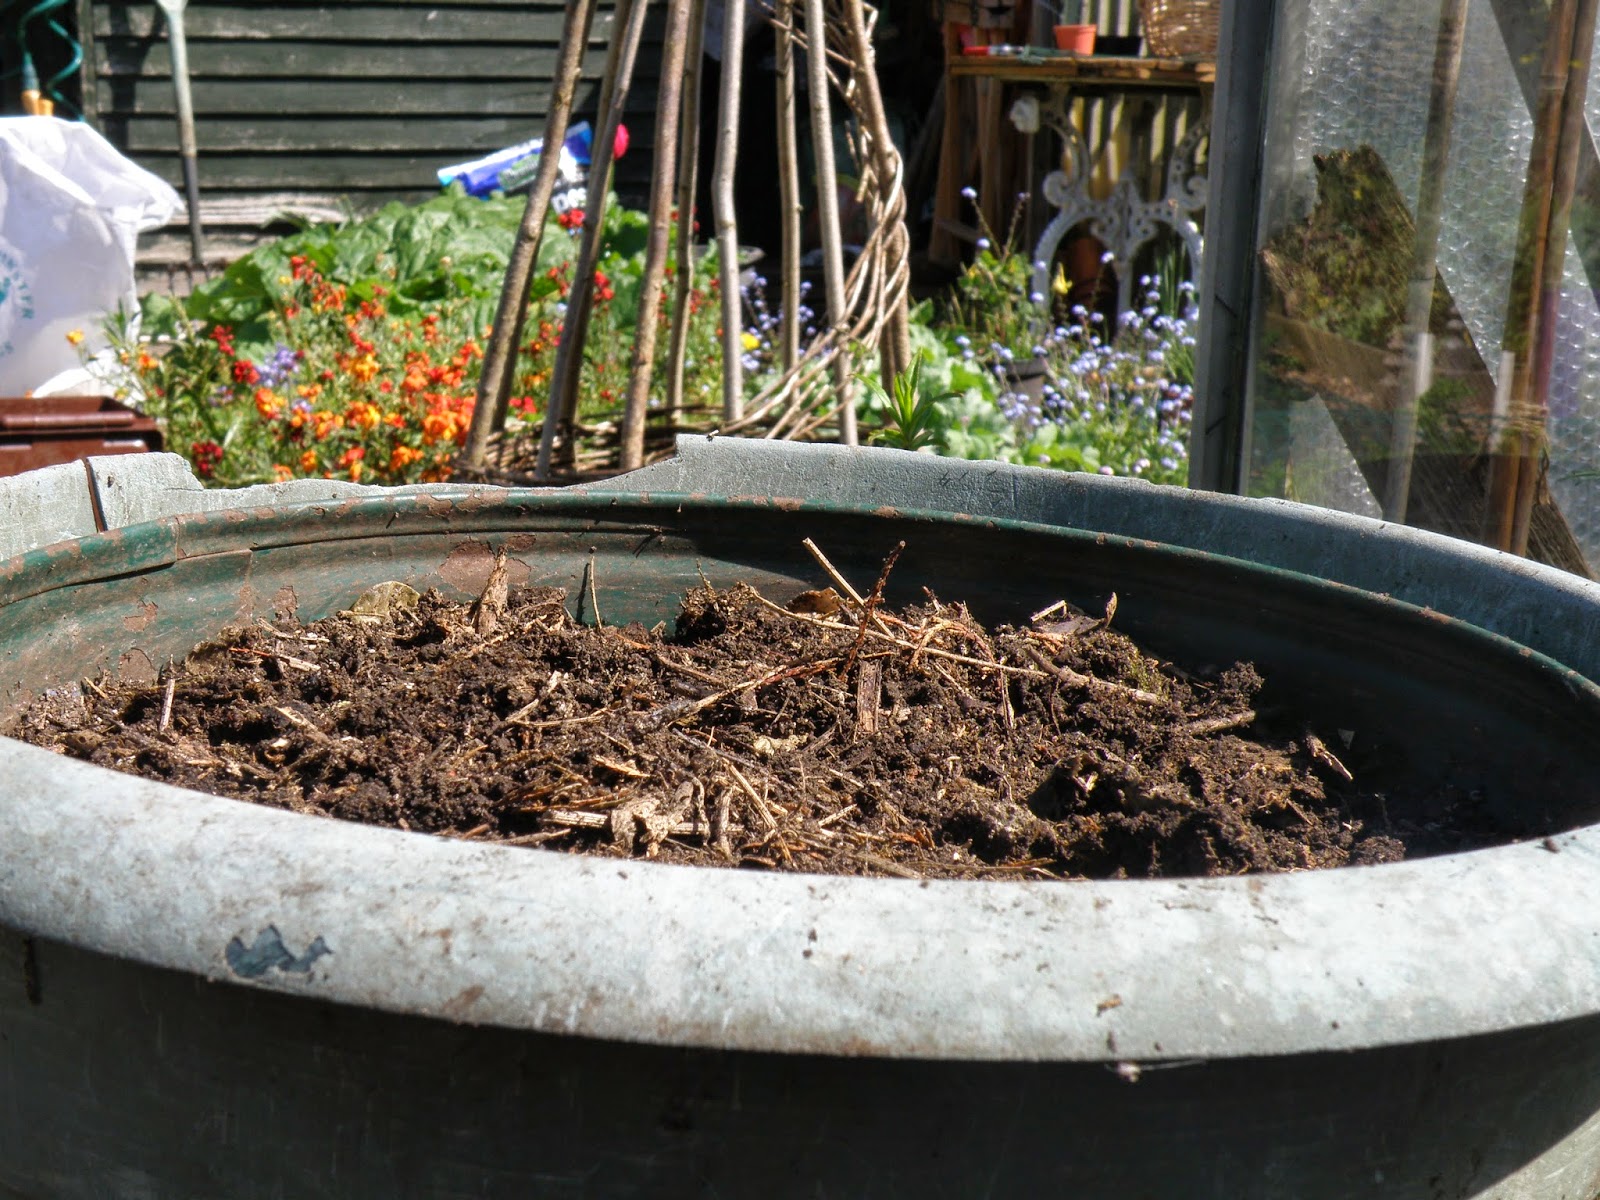
This is what I started with:

I use a large garden sieve.

Perched on a large pot ( which has seen better days).
Do this on a table or raised surface to prevent back ache.
Just add a spadeful at at time and push through the sieve. I use my hand. It's best if the compost is not too wet. 

This is what you get.
It looks impressive. You have to run your hands through it. It didn't take that long to fill the pot and I was talking to my neighbour for some of the time. I have done inside the greenhouse before on a wet day when I didn't really want to be outside.

All the bits left over can go back in the heap or into the dustbin, depending on what they are. I find bits of twig, plastic, plant labels and stones.  I don't know how the stones get in there.
Then I spread it on the garden or store it in bags until I need it. 

Friday 2 May 2014

Seedlings

Here are some of the seedlings growing in my conservatory. This is a fraction of the total.
Space is at a premium in May, everything growing fast but waiting for slightly warmer weather to be put outide. I am lucky to have two small greenhouses ( both salvaged from other gardens) and two years ago my husband built a cold frame from old windows. So I try to move things on from the cosy conservatory to the greenhouse and on to the cold frame and then outside as soon as possible. I think a couple more weeks before I can really plant tender things outside.
I am plagued by slugs. Even in the cold frame which has sand, ash and grit on the base - they still abound. So I start a lot off in here so I can keep and eye on it and the slugs can't!
I have a lot of pricking out and potting on to do this weekend. I'll also make sure I have sown everything I wanted.
Today I thought I would sow some Cavolo Nero. Went out to the greenhouse and thought "What's that in that tray? " Tiny seedlings of Cavolo Nero!

I am better than I thought or my mind has gone. I prefer the former.